NYC

Shooting Actor Headshots - Some questions by Christian Webb

Christian Webb Photo, Headshots, Actor Headshots, NYC I've been receiving a lot of wonderful feedback as of late from various enthusiasts and professionals within the photography communities I'm a part of.   First,  I'll say it's an awesome feeling to receive the amount of positive energy and love from so many people I don't even know!  Even more awesome is that many are professionals that I admire greatly!  With all of that said,  I've also received a lot of inquires relating to my work and how some of the photos are shot.  Questions ranging from my set up,  how I work during a shoot and what my post processing involves.  So,  I've decided to take a few of those question and answer them here on my blog.  Now, my blog receives very little traffic! lol.  I've yet to figure out how to make this work and I spend little time focused on it.  However, it's easier to  write such long winded posts here and then, share via my other social media outlets.  (all of which I'm no where near mastering either!)

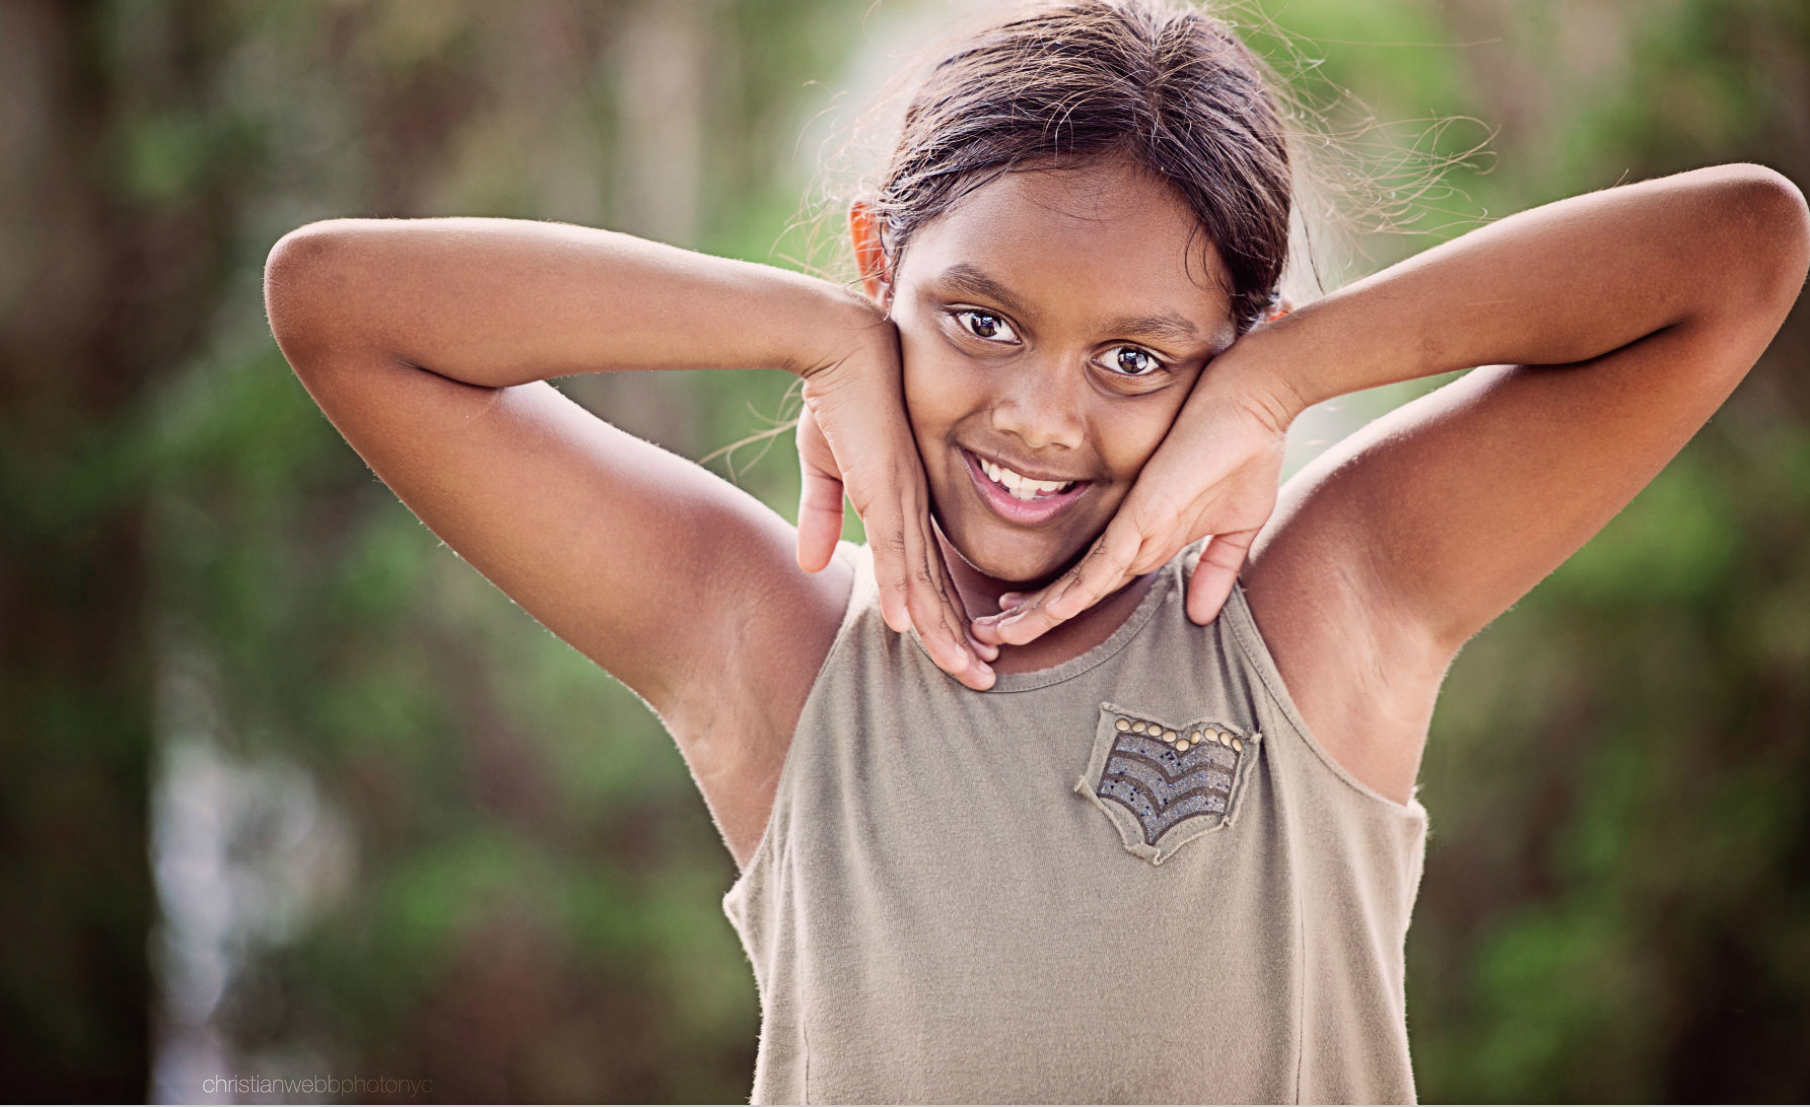
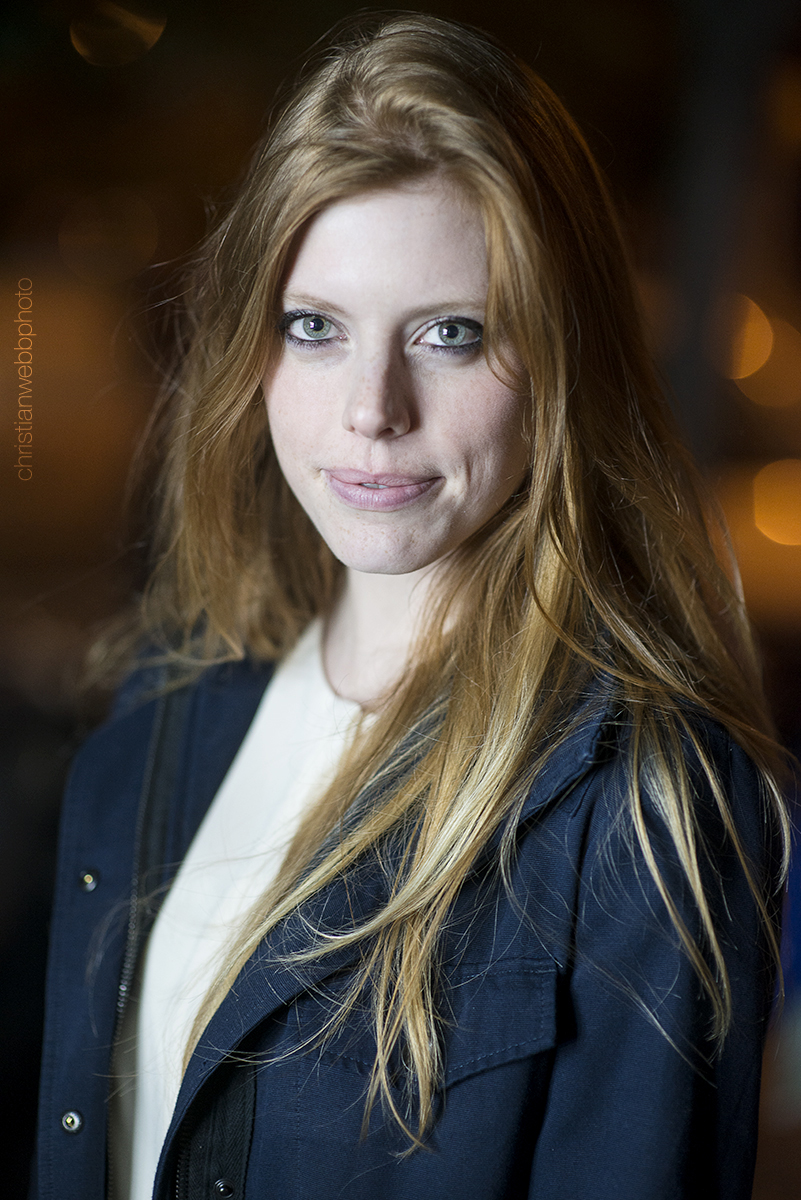
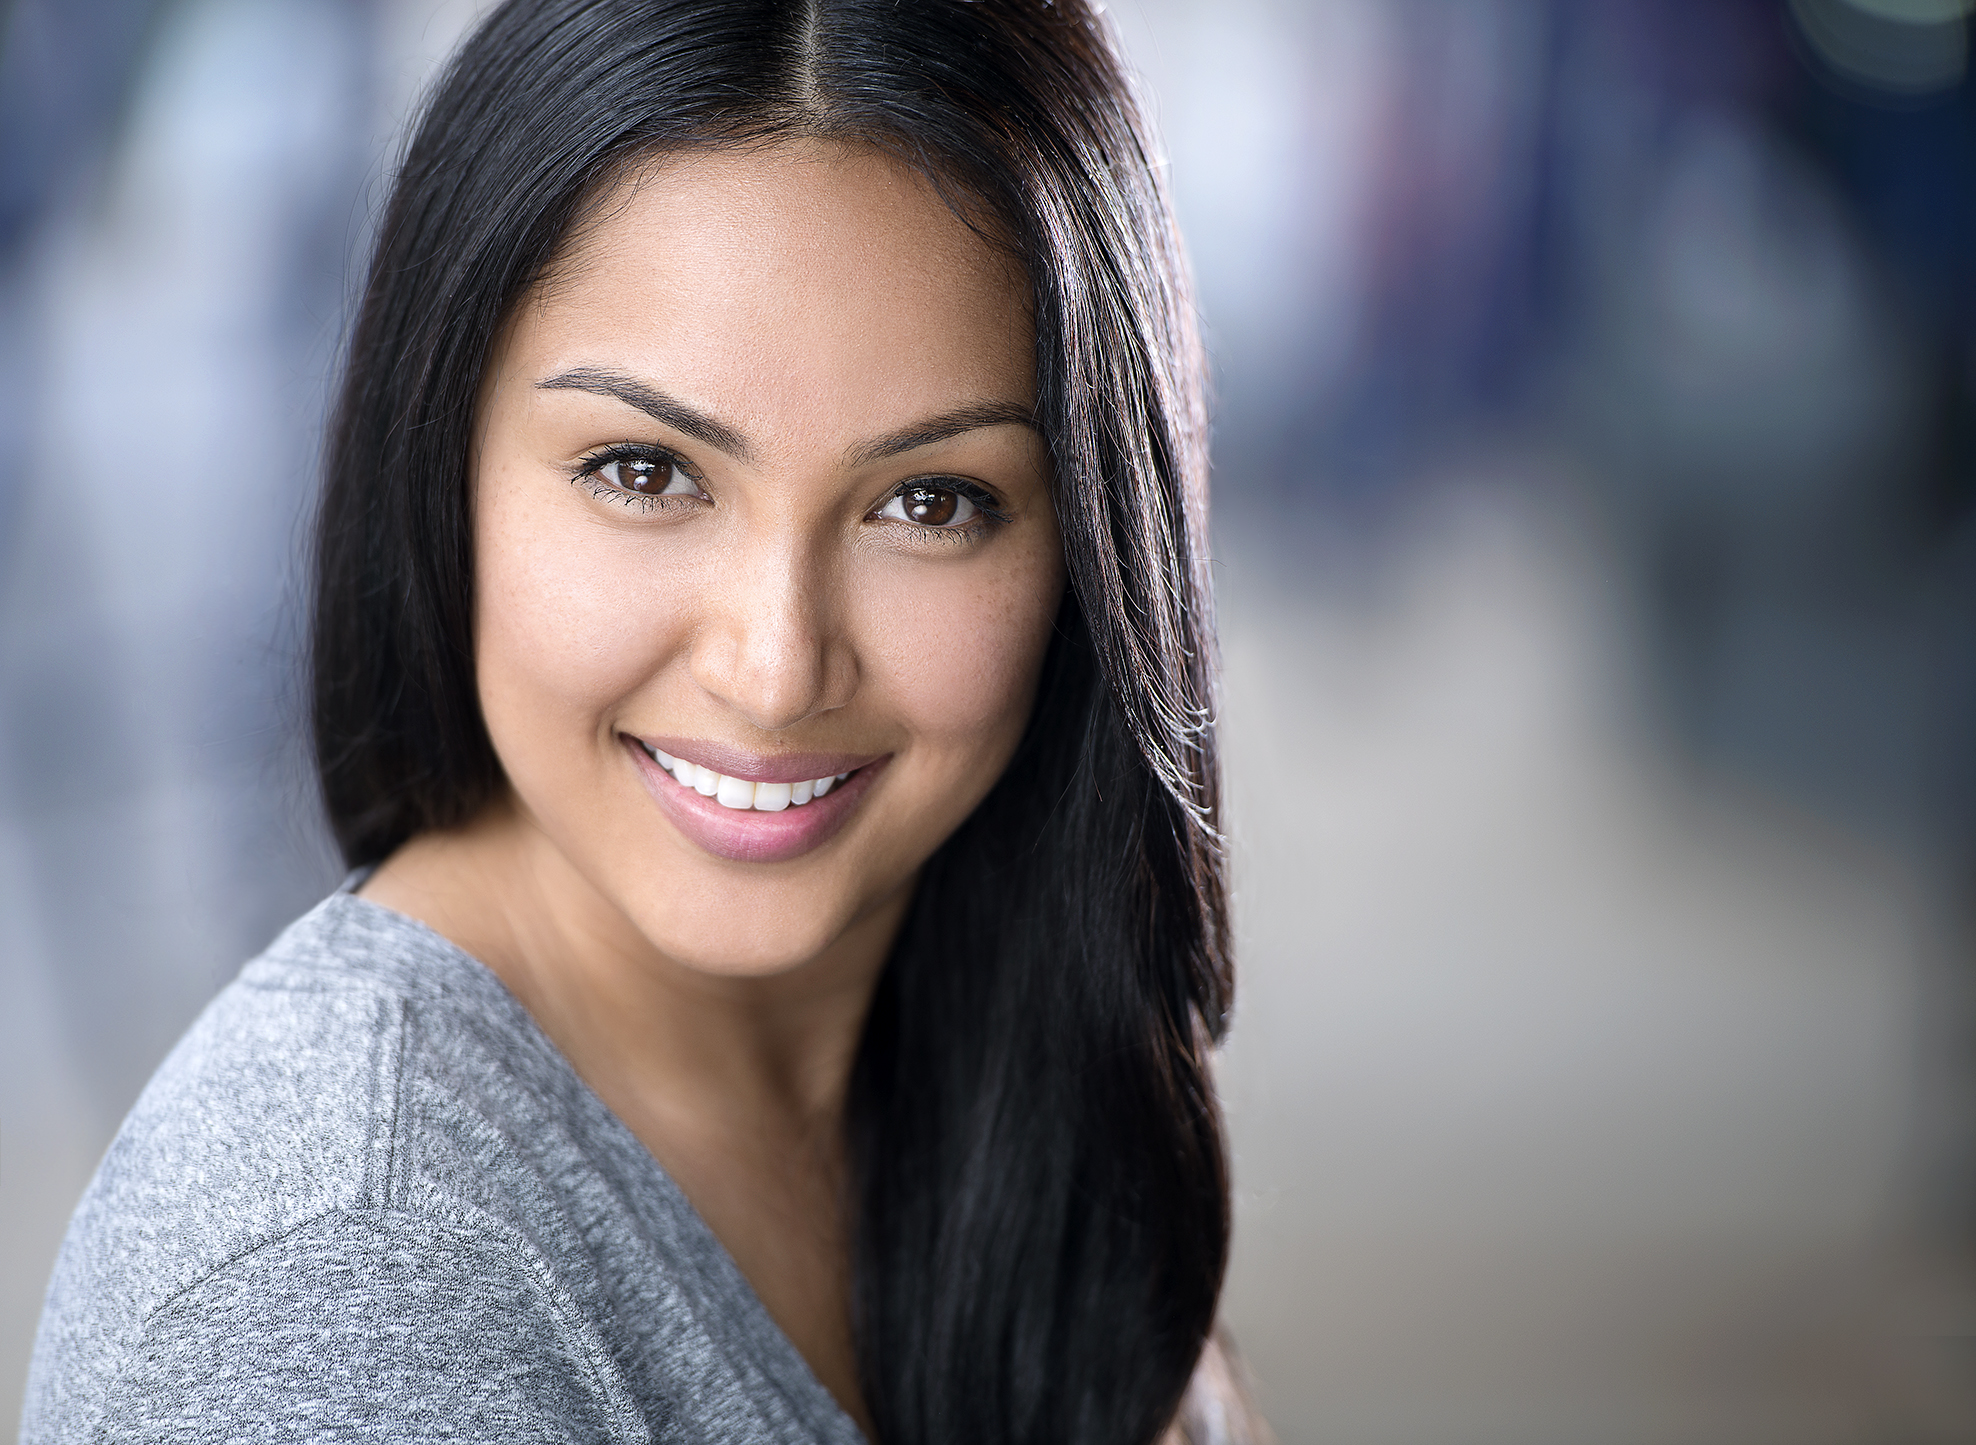
Okay, so today's question(s) comes from a photographer in London named Nina.  It's regarding the shot posted above.  Here's her original question(s) as it appeared on my FB:

Nina-Question


1.) How much instruction to the clients when it comes to posing, expression and such?  

A LOT!  I  can't stress that enough!   Many people, including actors are not comfortable sitting down for a headshot.  As a result, they tend to stiffen up and also, have little idea of what to do    with themselves.  Most haven't studied posing and photography either and are not                       conscious of the fact that slight movements of their head, their body angle can change an           entire shot.  After make-up / hair is done and they first get in front of the camera,  I spend a         good five minutes or so just discussing the nuance of movement and different angles.  I talk       about what I'll be telling them throughout the shoot and help them to understand why I'm           coaching them as I am.  One quick example -  I tell the client to sit as they'd like, natural but         as they normally would to have their photo taken.  Just about EVERYONE sits upright and             lift their heads, chins and lean back and away from the camera.  I take a quick shot.  Then, I         instruct them to drop their head, drop their chin some and lean in slightly toward me.   I take that shot and show then show them both pics.  They're AMAZED at the difference and it helps for the rest of the shoot.  With regard to expression,  it's probably THE single most important thing during the shoot.   It takes A LOT of work, A LOT of coaching and A LOT of communication to get what you need, what they need.  Sometimes,  you get people who just....get it....and they're great with bringing a range of emotions and different looks.  They're fun, dynamic with their looks and extremely versatile and know how to work the camera.  Sometimes though, a lot of times, you get people who have one maybe two looks in their arsenal and THAT'S IT! You have to spend time getting them to open up and to feel comfortable enough to go through ranges of emotions.  For the most part,  it's all fun!  It's just knowing how to talk, have fun and relate to the clients.  Often times, you have to go above and beyond to get them going but hey, that's all part of the magic!  

Christian Webb Photo, BTS

2. )  Camera alignment:

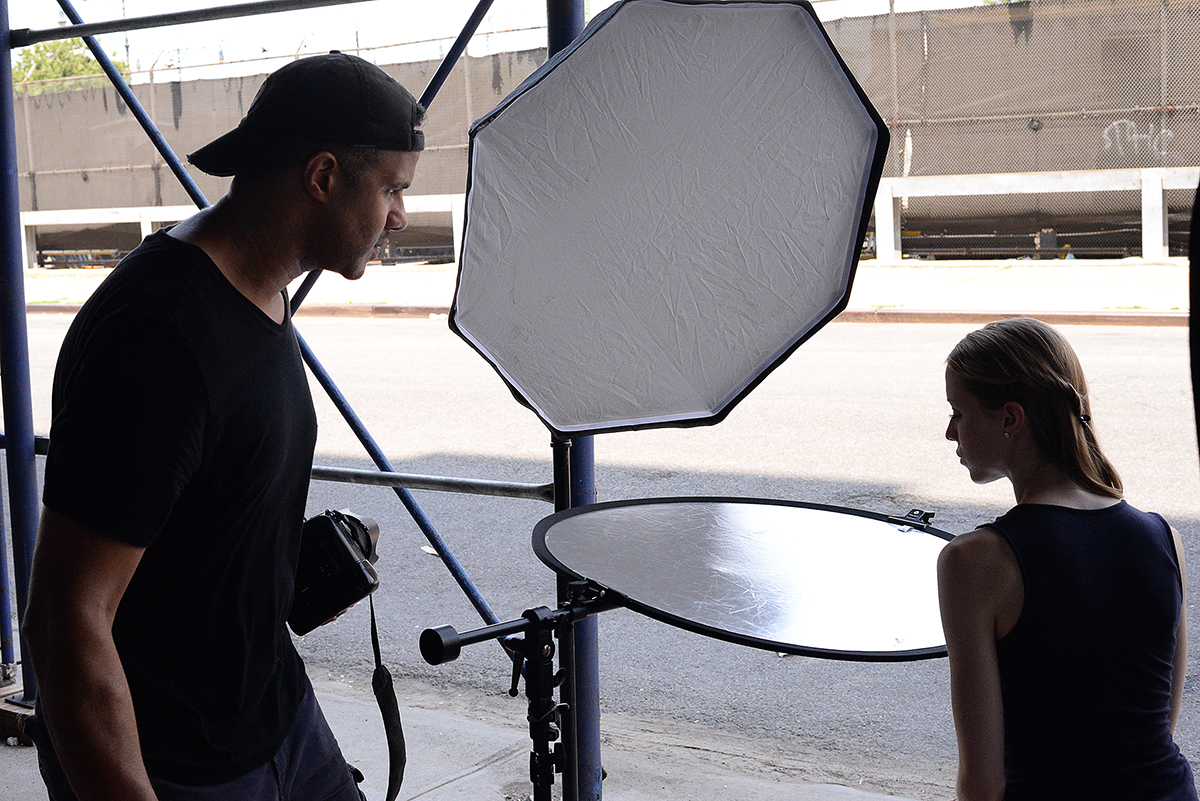
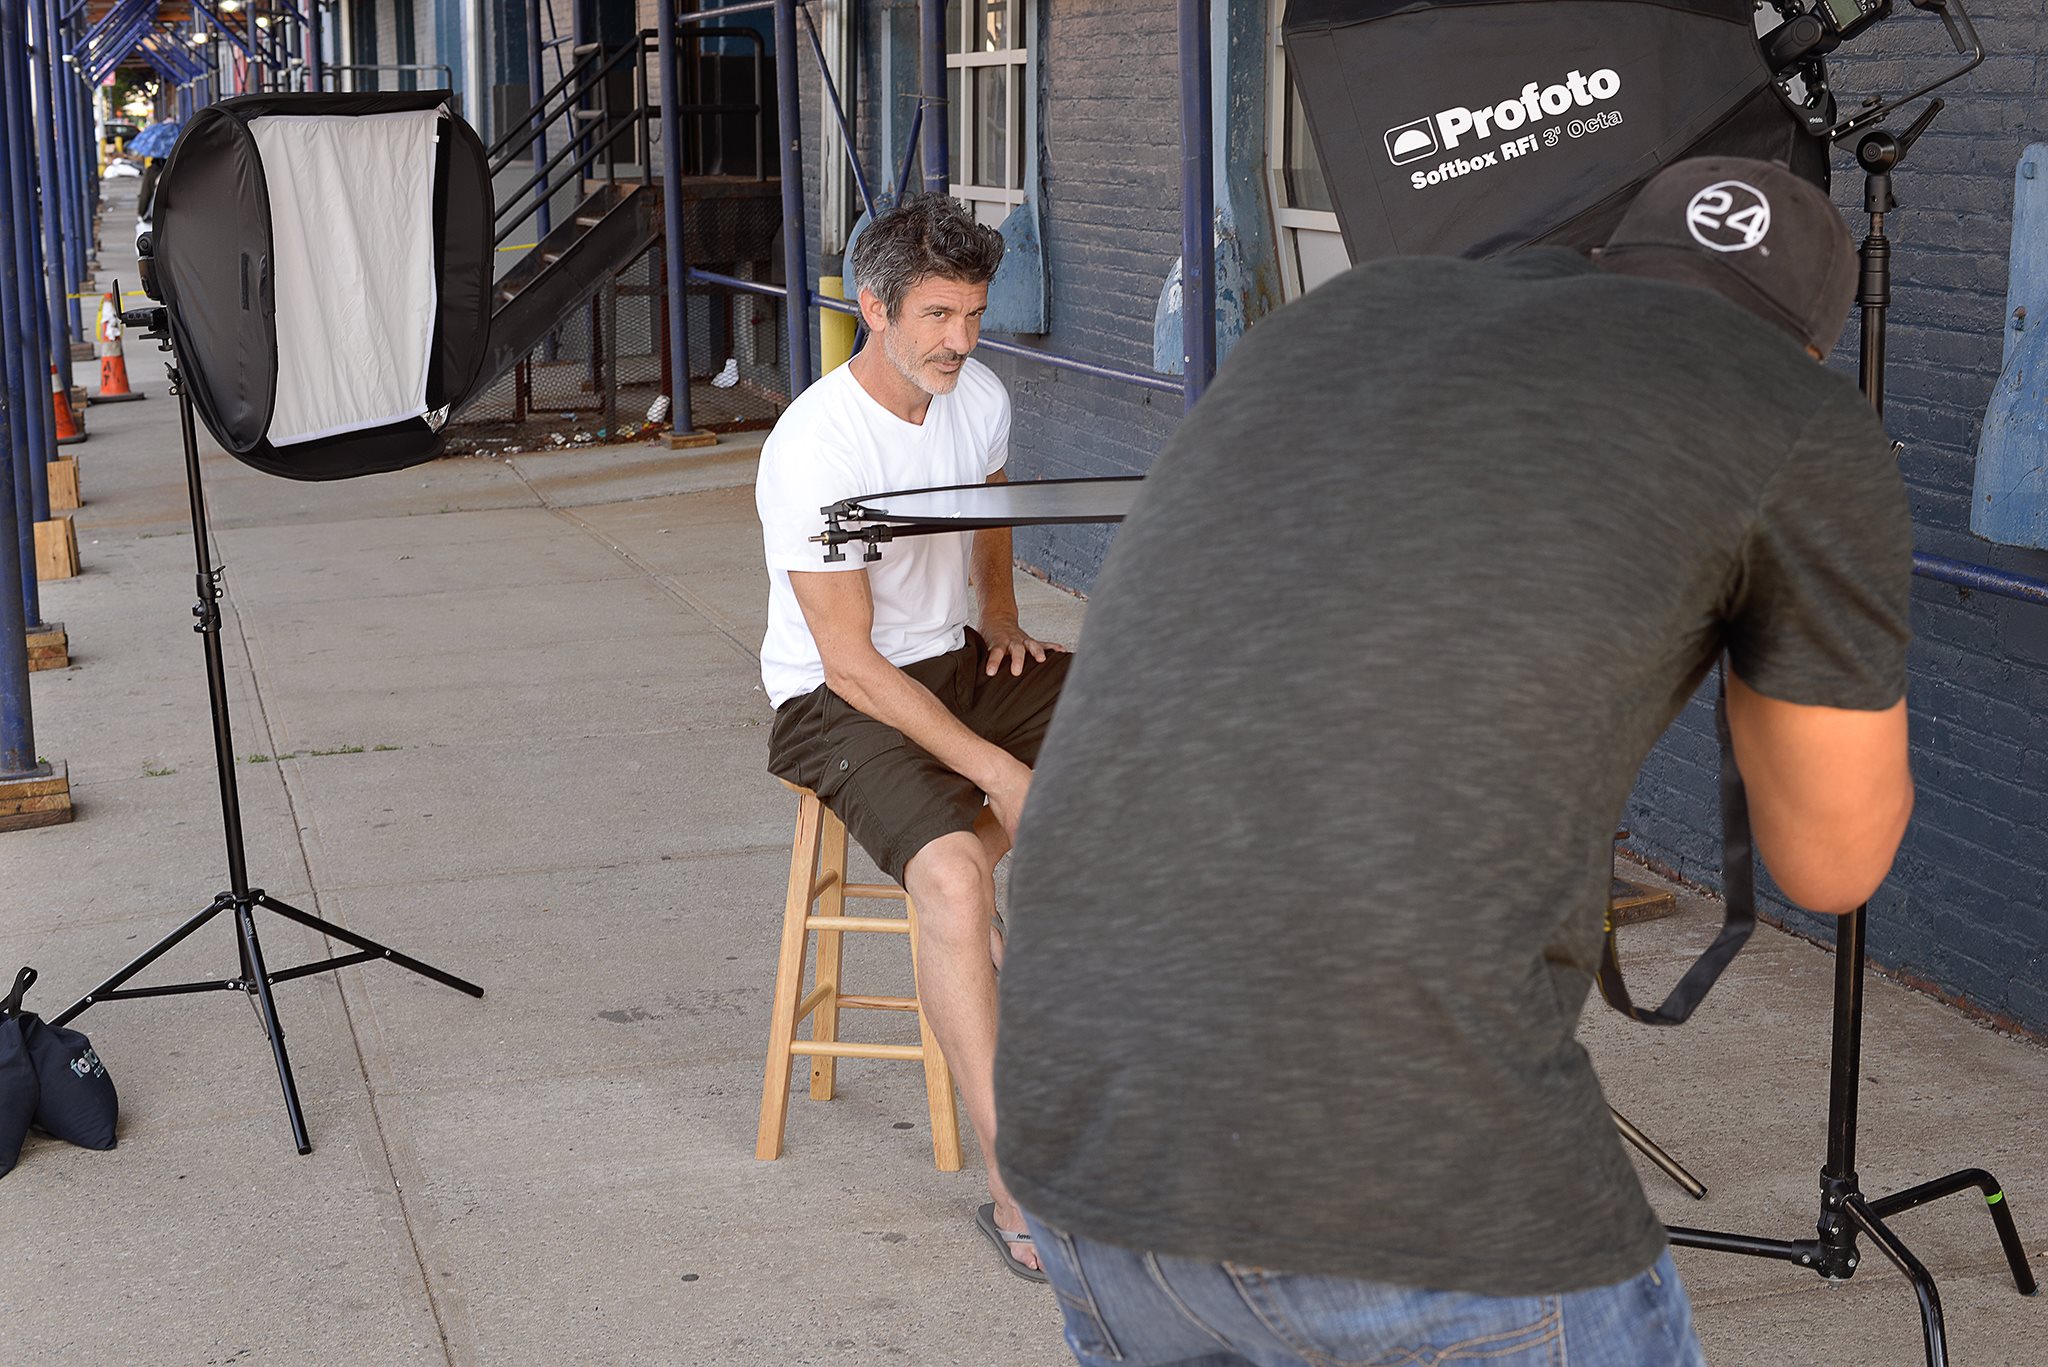
I try to stay pretty level with the client.  There are times when I do get slight angles from above based on how much I have the client leaning in toward me.  I usually make adjustments in my stance and such to accommodate the movements though.  I spend a good amount of time dancing around and shuffling my feet/stance!  I don't like extreme angles from above and definitely not from below!

Christian Webb Photo actors headshots NYC

3.)  The variance in blur between background & subject - is it achieved or modified in post:

I shoot at an aperture of 3.2 with a 70-200mm lens zoomed all the way out to 200mm so everything blurs.  This plus the fact that my clients are not sitting against any particular backgrounds outside is how the look is achieved.  I do absolutely nothing in the post processing regarding the backgrounds.  If anything,  I will occasionally need to clone stamp, crop out or blur random blurred items or distracting elements but other than that,  the shots are as is when they come from the camera.

Christian Webb Photo, actors headshots NYC

So, hope I've shed some light on things and answered the questions thoroughly.  "Thank You" to Nina for the question and hopefully others will find this post informative.

~ Christian


Kids Photography! The hardest subjects to photograph? by Christian Webb

"Want go 1 on 1 real quick?" Prior to focusing 100% of my business on headshots, I photographed a lot of children.  It just made sense as my two sons are in the business and I work with the children's divisions of a couple of agencies.   Children make awesome subjects and provide a lot of fun while shooting them.  However,  the challenges getting good shots can be tricky!

A photographer friend emailed me recently about some project he's involved in photographing children.   The photos he sent me were supposed to be "candid" photos of the kids.   The photos were fine but he was upset as they weren't technically good and didn't look as if a professional photographer shot them.   Well, they're "candids" yeah? So it doesn't matter right? Wrong!  Candid photography doesn't mean bad photography.  Especially if the person shooting is an actual "photographer."   There are tons of candid moments caught by photographers that are great shots.   If we're talking about the casual user, a parent, non-photographer snapping a few iPhone pics of their kids, then it's not that serious.  But, if like my friend, you're a photographer and have an actual assignment (paid or not) that requires you capturing some great images of children,  then read on.  Here are some tips for shooting the always active, always adorable little people of the world we call,  kids!

"Just as happy as can be!"

To start out with,  if you've taken the time to be a photographer and sell yourself as such,  you most certainly should KNOW your camera!  Know it's settings and know how to use them in various situations.  Whether you're shooting kids, animals, a landscape or whatever,  you should be well versed in the basics and have a good grasp on your camera's capabilities.   If you're a casual shooter who may want to step up your shots some and have invested in a dslr,  the following should be a good starting point for you.   With that said, let's move into some basics that specifically relate to shooting kids.


Leaf us be!

1)  SPEED-  Speed is everything when shooting fast moving kids!  If you're shooting with a dslr, you'll want to put your camera into  SHUTTER PRIORITY mode. (check your brand of camera for selecting this mode.)  What this essentially does is allow you to set a shutter speed you need and the camera will set the correct aperture for a correct exposure.   If you've got kids running around, playing, doing sports, you'll want a pretty high shutter speed to capture them in motion and get clean, crisp shots. Experiment a bit until you get a speed that suits what you're doing.

Brother & Sister love

2.)  LIGHTING -  That should pretty much go without saying for any photographer as lighting, is everything!  With your camera in Shutter Priority,  your exposure will take care of itself. However, you still need to be mindful of the ambient lighting.  If you're outdoors on a nice sunny day,  you'll be fine.  Even on an overcast day (great days to shoot!) you'll pretty much have no issues. Look for evenly shaded areas and avoid "speckled shade"....like shade coming unevenly through the leaves on trees.  You'll end up with spots of highlights and uneven lighting on your subjects.   However, if you're shooting indoors in low light, things can get tricky.   Depending on how fast your lens is and how well your camera's ISO performance is, you'll need to really pay attention and make some tweaks.  Assuming you're using no flash and just keeping things, casual and....candid......You'll want to look for the light!  Windows, skylights, doorways, overhead lighting etc.  When you do find natural light, like sun coming through a window, be sure to stay mindful of HOW that light is coming in and how it's spreading.  You don't want to get a kid running in front of a window but a huge highlight of sun washes him out and blows highlights.  Look for sources of diffusion as well.  A window with harsh sun beaming through it may be great but if there are some sheer curtains hanging, try closing them to get a nice, soft, even light.

Overcast at the beach!

3.) WHITE BALANCE -  The color temperature of a photo can make or break it.  Different lighting has different temperatures.  Make sure you're mindful of your camera's white balance setting.  Most dslr's have preset white balance settings that you can choose depending on your environment.  Daylight or Cloudy/Shade setting for outdoors and  Incandescent or Fluorescent for indoor lighting. You can also just leave the setting on AUTO WB.  It's a good idea though to get used to knowing the different types of lighting, their respective temperatures and how they'll effect your images.

Strike a pose!

4.) FOCUS - There's probably waaaaay too much to get into here regarding focusing.  It can get pretty complex.  Safe to say that you'll most likely want to be in auto focus mode AF.  Depending on your camera, there are several AF modes and configurations to consider.  Nikon has three auto focus modes:  AF-A (auto), AF-C (continuous)  and AF-S (single).  AF-S is for a subject that is stationary while AF-C is for moving subjects.  For children running here and there and constantly moving,  you'll want to shoot in AF-C, Continuous Mode.  In this mode, the camera will recognize that you're shooting a moving subject and it will hold focus on that subject as it moves.  (while your shutter button is half pressed.) (check your camera manufacturer for details on it's auto focus mode settings and how they work.)  Nikon's AF-A mode will automatically switch between AF-S and AF-C depending on what the subject is doing.  How you select these modes and how they're activated can be a matter of preference.  You should most certainly study your camera, become familiar with the modes and get used to how they work.

At the end of the day,  in both cases above, these are supposed to be "candid" shots yes? Not photoshoots.  That said, I'm not implying that you "set up" your environments and shots.  It's about just being mindful and prepared in your environments and knowing your subjects. In this case,  energy filled, never at rest kids.  Preparation, even in spontaneity is everything. Sounds odd yeah?  But as a photographer,  preparation is everything.  Having the correct camera settings ready to go and understanding how to use them will ultimately help you to capture those spontaneous, precious and candid moments that would otherwise be missed or captured poorly.  Without question though and above all,  let kids be kids and have fun capturing the joy!


NYC NIGHTS - Street portraits by Christian Webb

Took lil' bro' out last night to work on his photography. Teaching him about the constantly changing lighting conditions at night...and finding/using available light when shooting street portraits. Here are a few I managed to snag myself, including one of my apprentice! lol!  He got a bunch of great shots as well and had a BLAST meeting and hanging with people downtown. (stay tuned for his blog to see some of his work! ) #NYC #NIKONNIGHTS Christian Webb Photo-Ariana!Christian Webb Photo-BlondeChristian Webb Photo-BeardDudeChristian Webb Photo-Miriam&MaxChristian Webb Photo-Apprentice